
Creating Custom Resin Trays: A Step-by-Step DIY Guide


Creating custom resin trays is a fantastic way to add a personal touch to your home décor or create a unique gift. With the right tools and a little creativity, you can craft stunning pieces that reflect your style. This step-by-step DIY guide will walk you through the process of making your own resin trays.
Gathering Your Materials
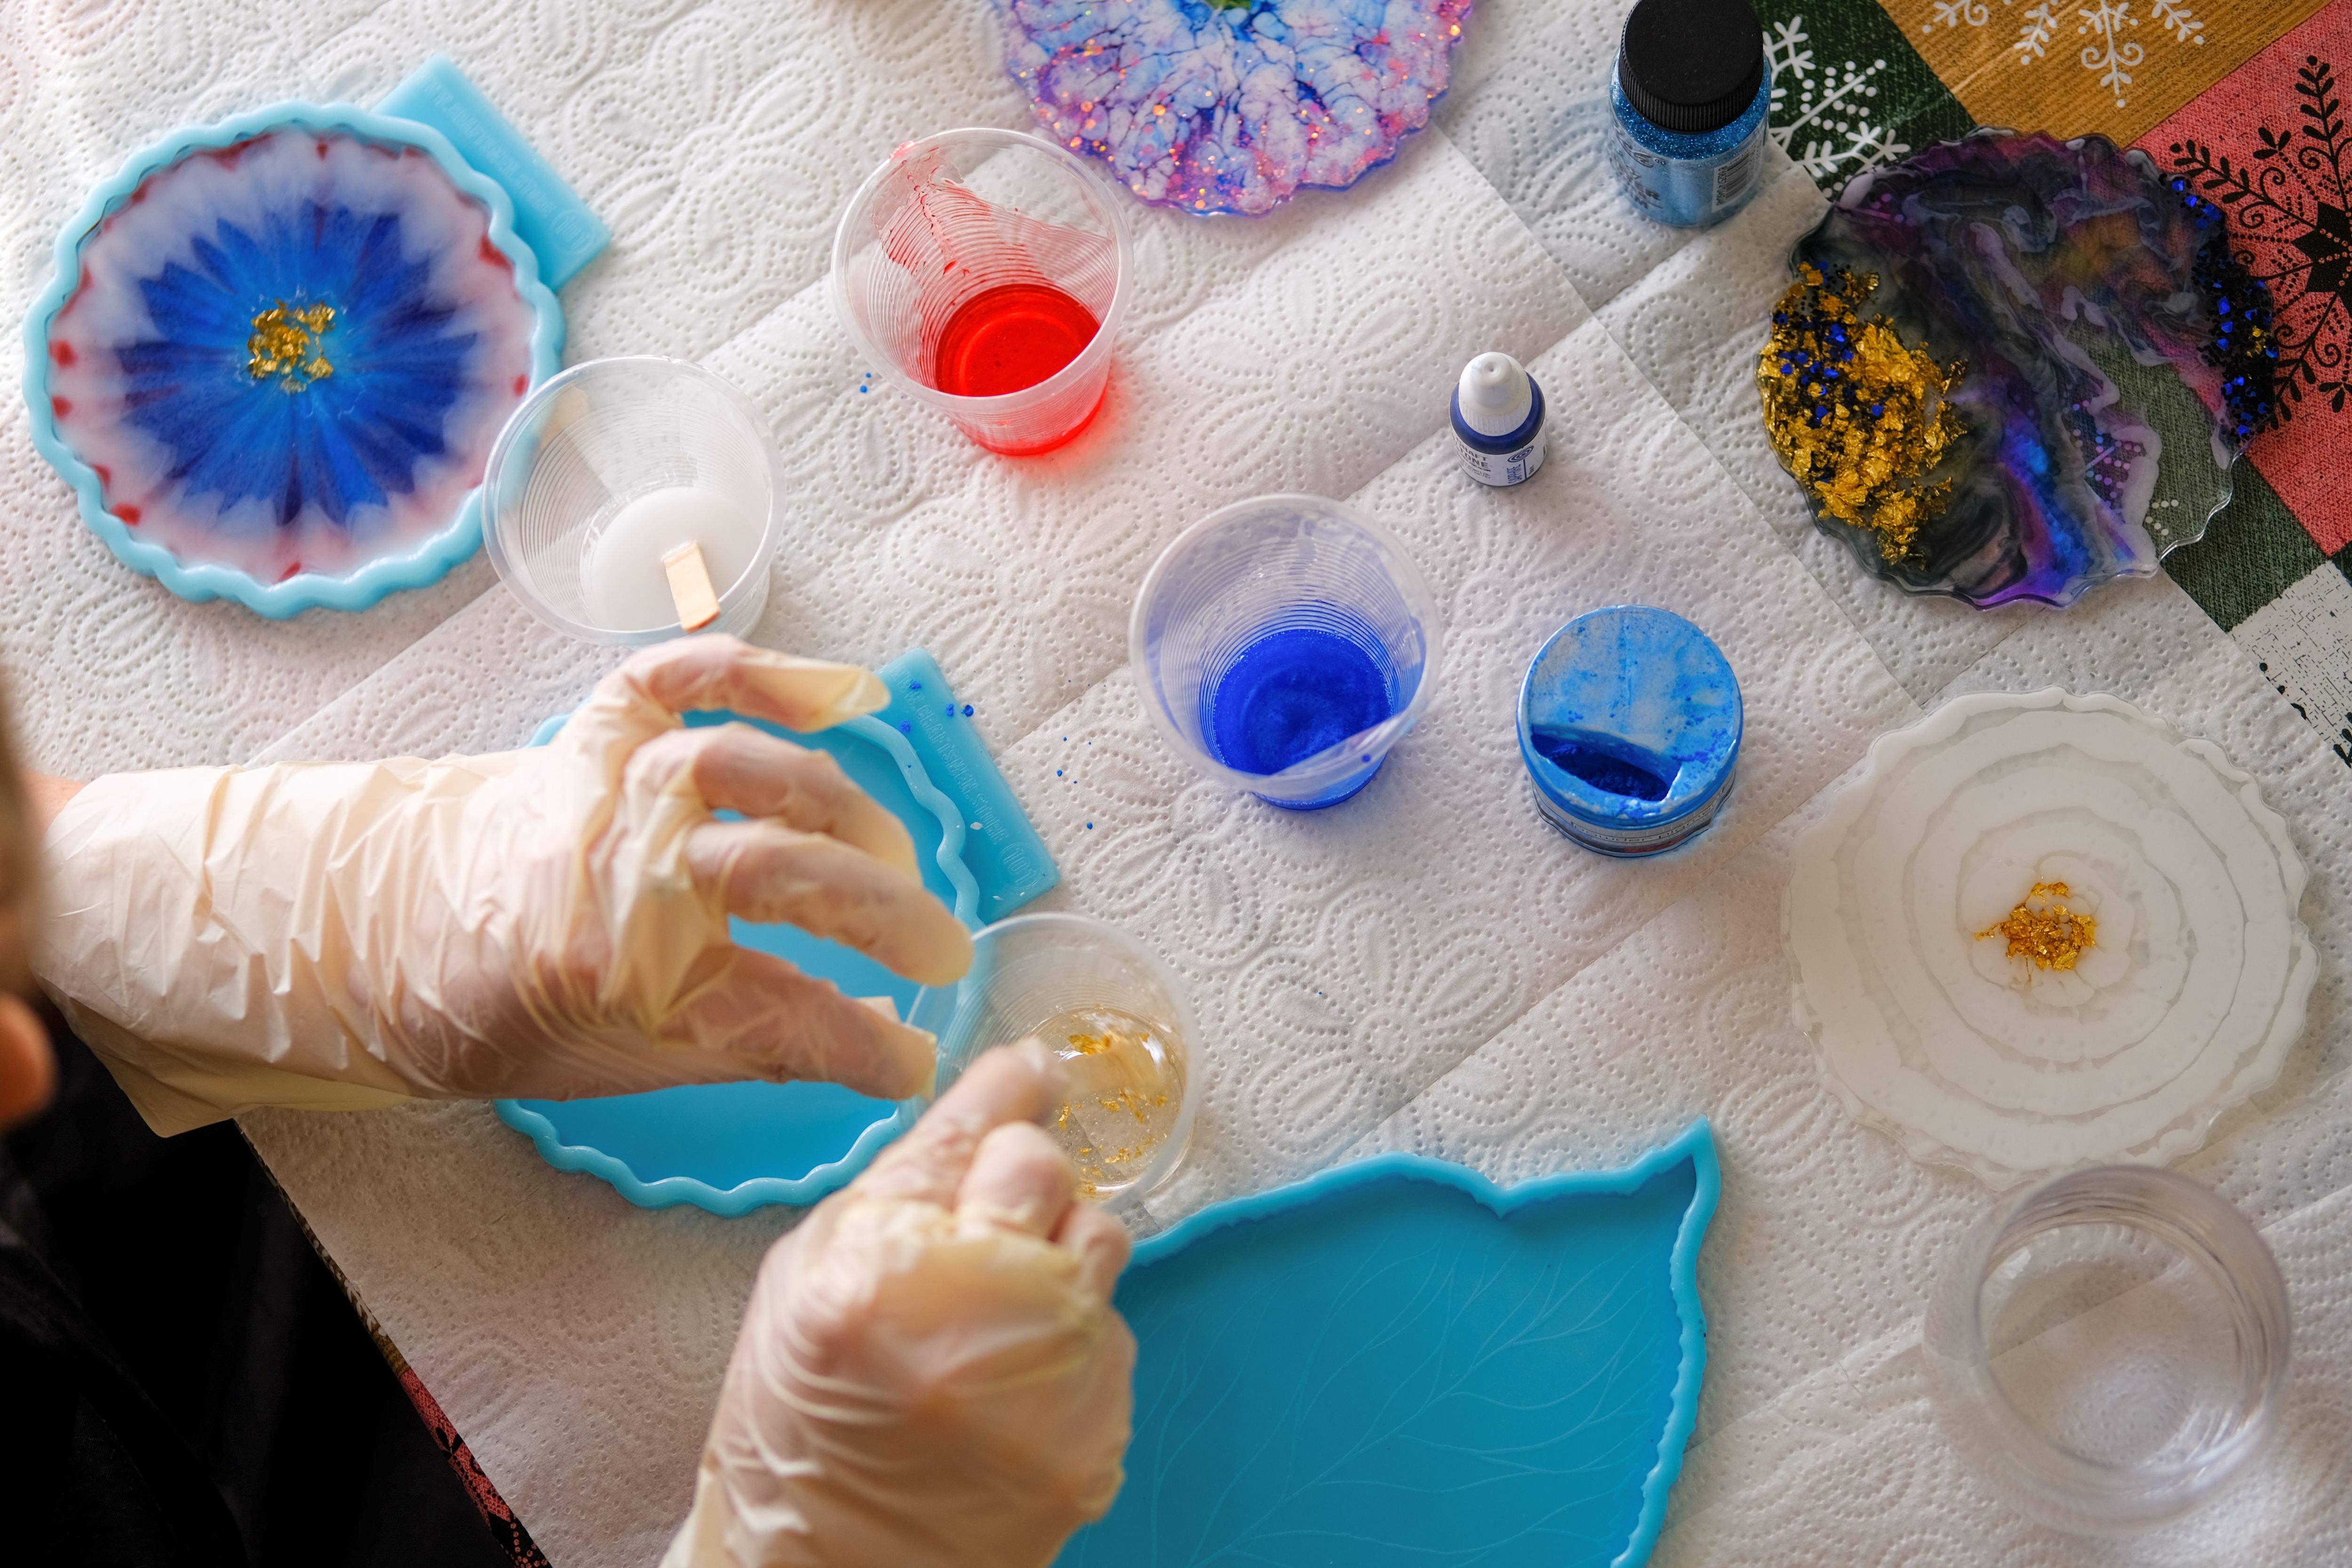
The first step in creating a custom resin tray is gathering all the necessary materials. You'll need resin and hardener, a mold in the shape of your desired tray, mixing cups, stirring sticks, and protective gear like gloves and goggles. Additionally, you can collect embellishments such as glitter, dyes, or small decorative items to embed in the resin.
It's important to choose high-quality resin suitable for crafting; look for options labeled as clear casting resin, as this will provide the best finish for your project.
Preparing Your Workspace
A well-prepared workspace is essential for any DIY project. Make sure you have a flat, clean surface to work on and cover it with protective material like plastic sheeting or newspaper. Ensure the area is well-ventilated, as resin can release fumes during the curing process.
Organize your materials within easy reach, and keep paper towels on hand for any spills or messes. Having everything ready before you begin will make the process smoother and more enjoyable.
Setting Up the Mold
Before mixing your resin, prepare your mold by ensuring it's clean and dry. If you want to create a tray with intricate designs, consider using a mold release spray to help remove the tray once it’s cured without damaging the mold.
Mixing and Pouring the Resin
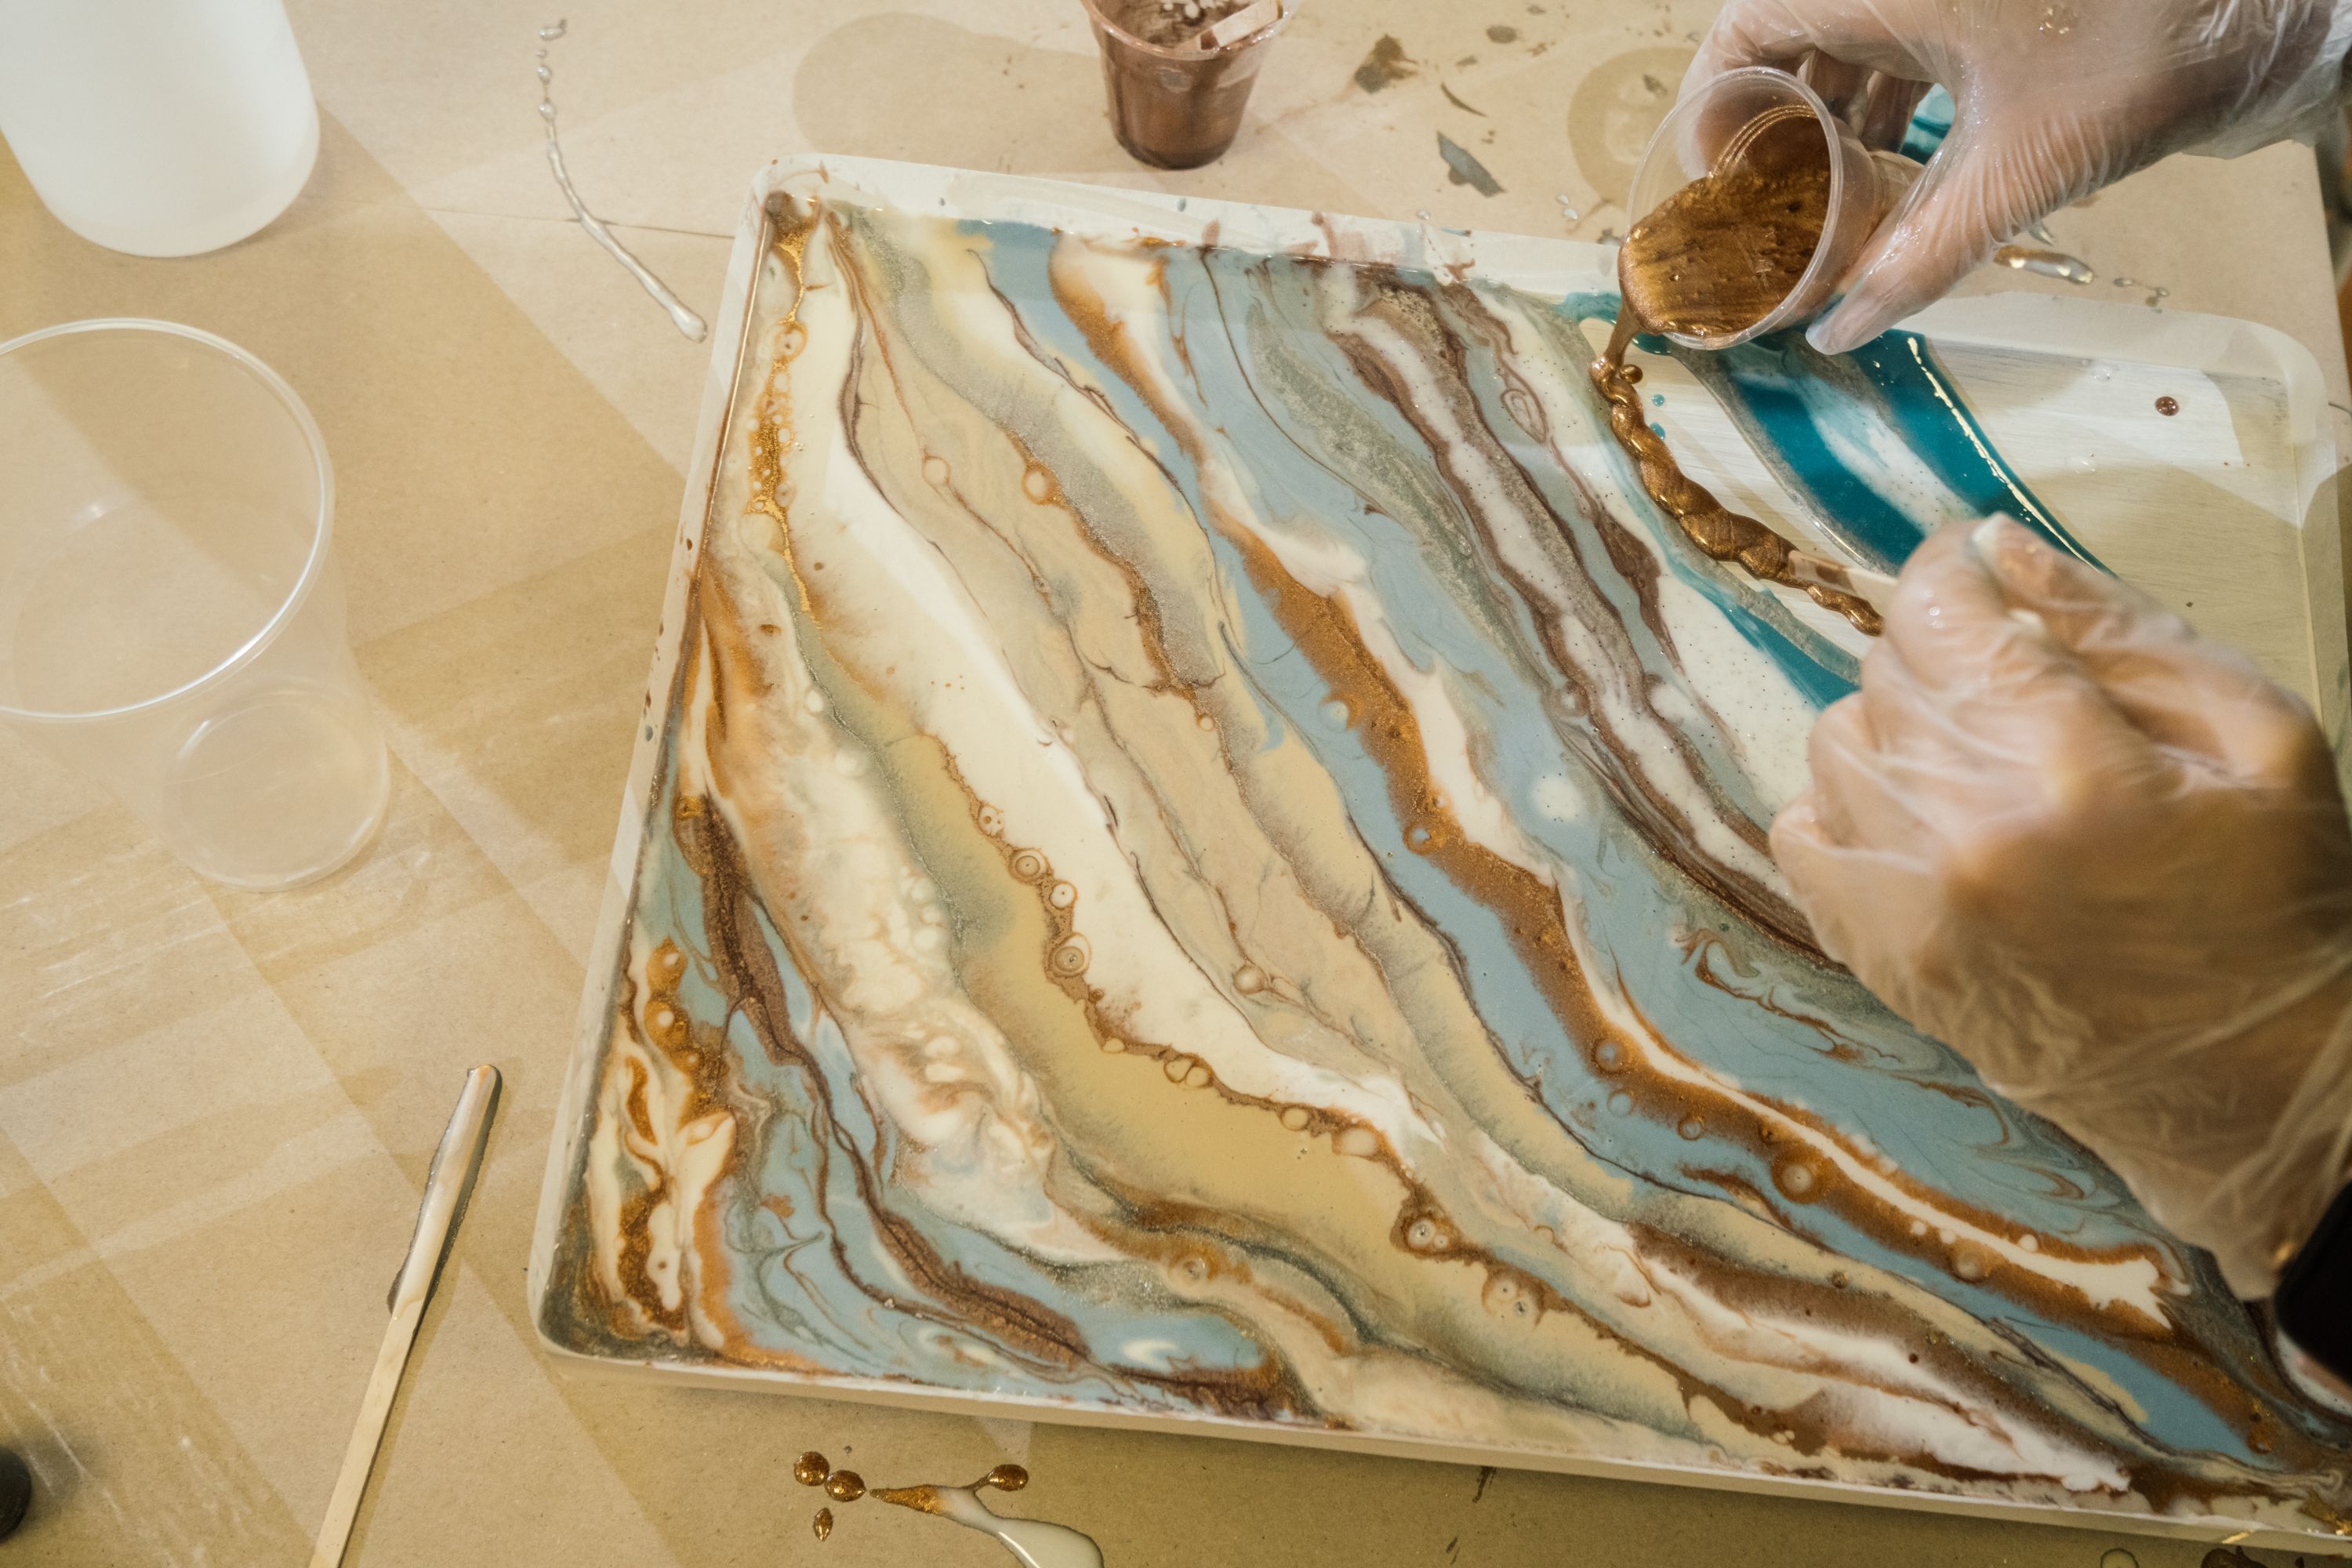
Now it’s time to mix your resin. Follow the manufacturer's instructions carefully to ensure the correct ratio of resin to hardener. Measure the components accurately, as improper ratios can affect the curing process.
Once mixed, pour the resin into your prepared mold slowly to avoid bubbles. If you notice bubbles forming, use a heat gun or hairdryer on a low setting to gently remove them.
Adding Embellishments
This is where you can let your creativity shine. Add embellishments like glitter, dried flowers, or small trinkets to the resin before it begins to set. Use a toothpick or stick to position items where you want them within the tray.
Curing and Finishing Touches
Allow your resin tray to cure according to the instructions provided with your resin kit. This usually takes between 24 to 48 hours. Be patient, as rushing this step can compromise the quality of your finished tray.
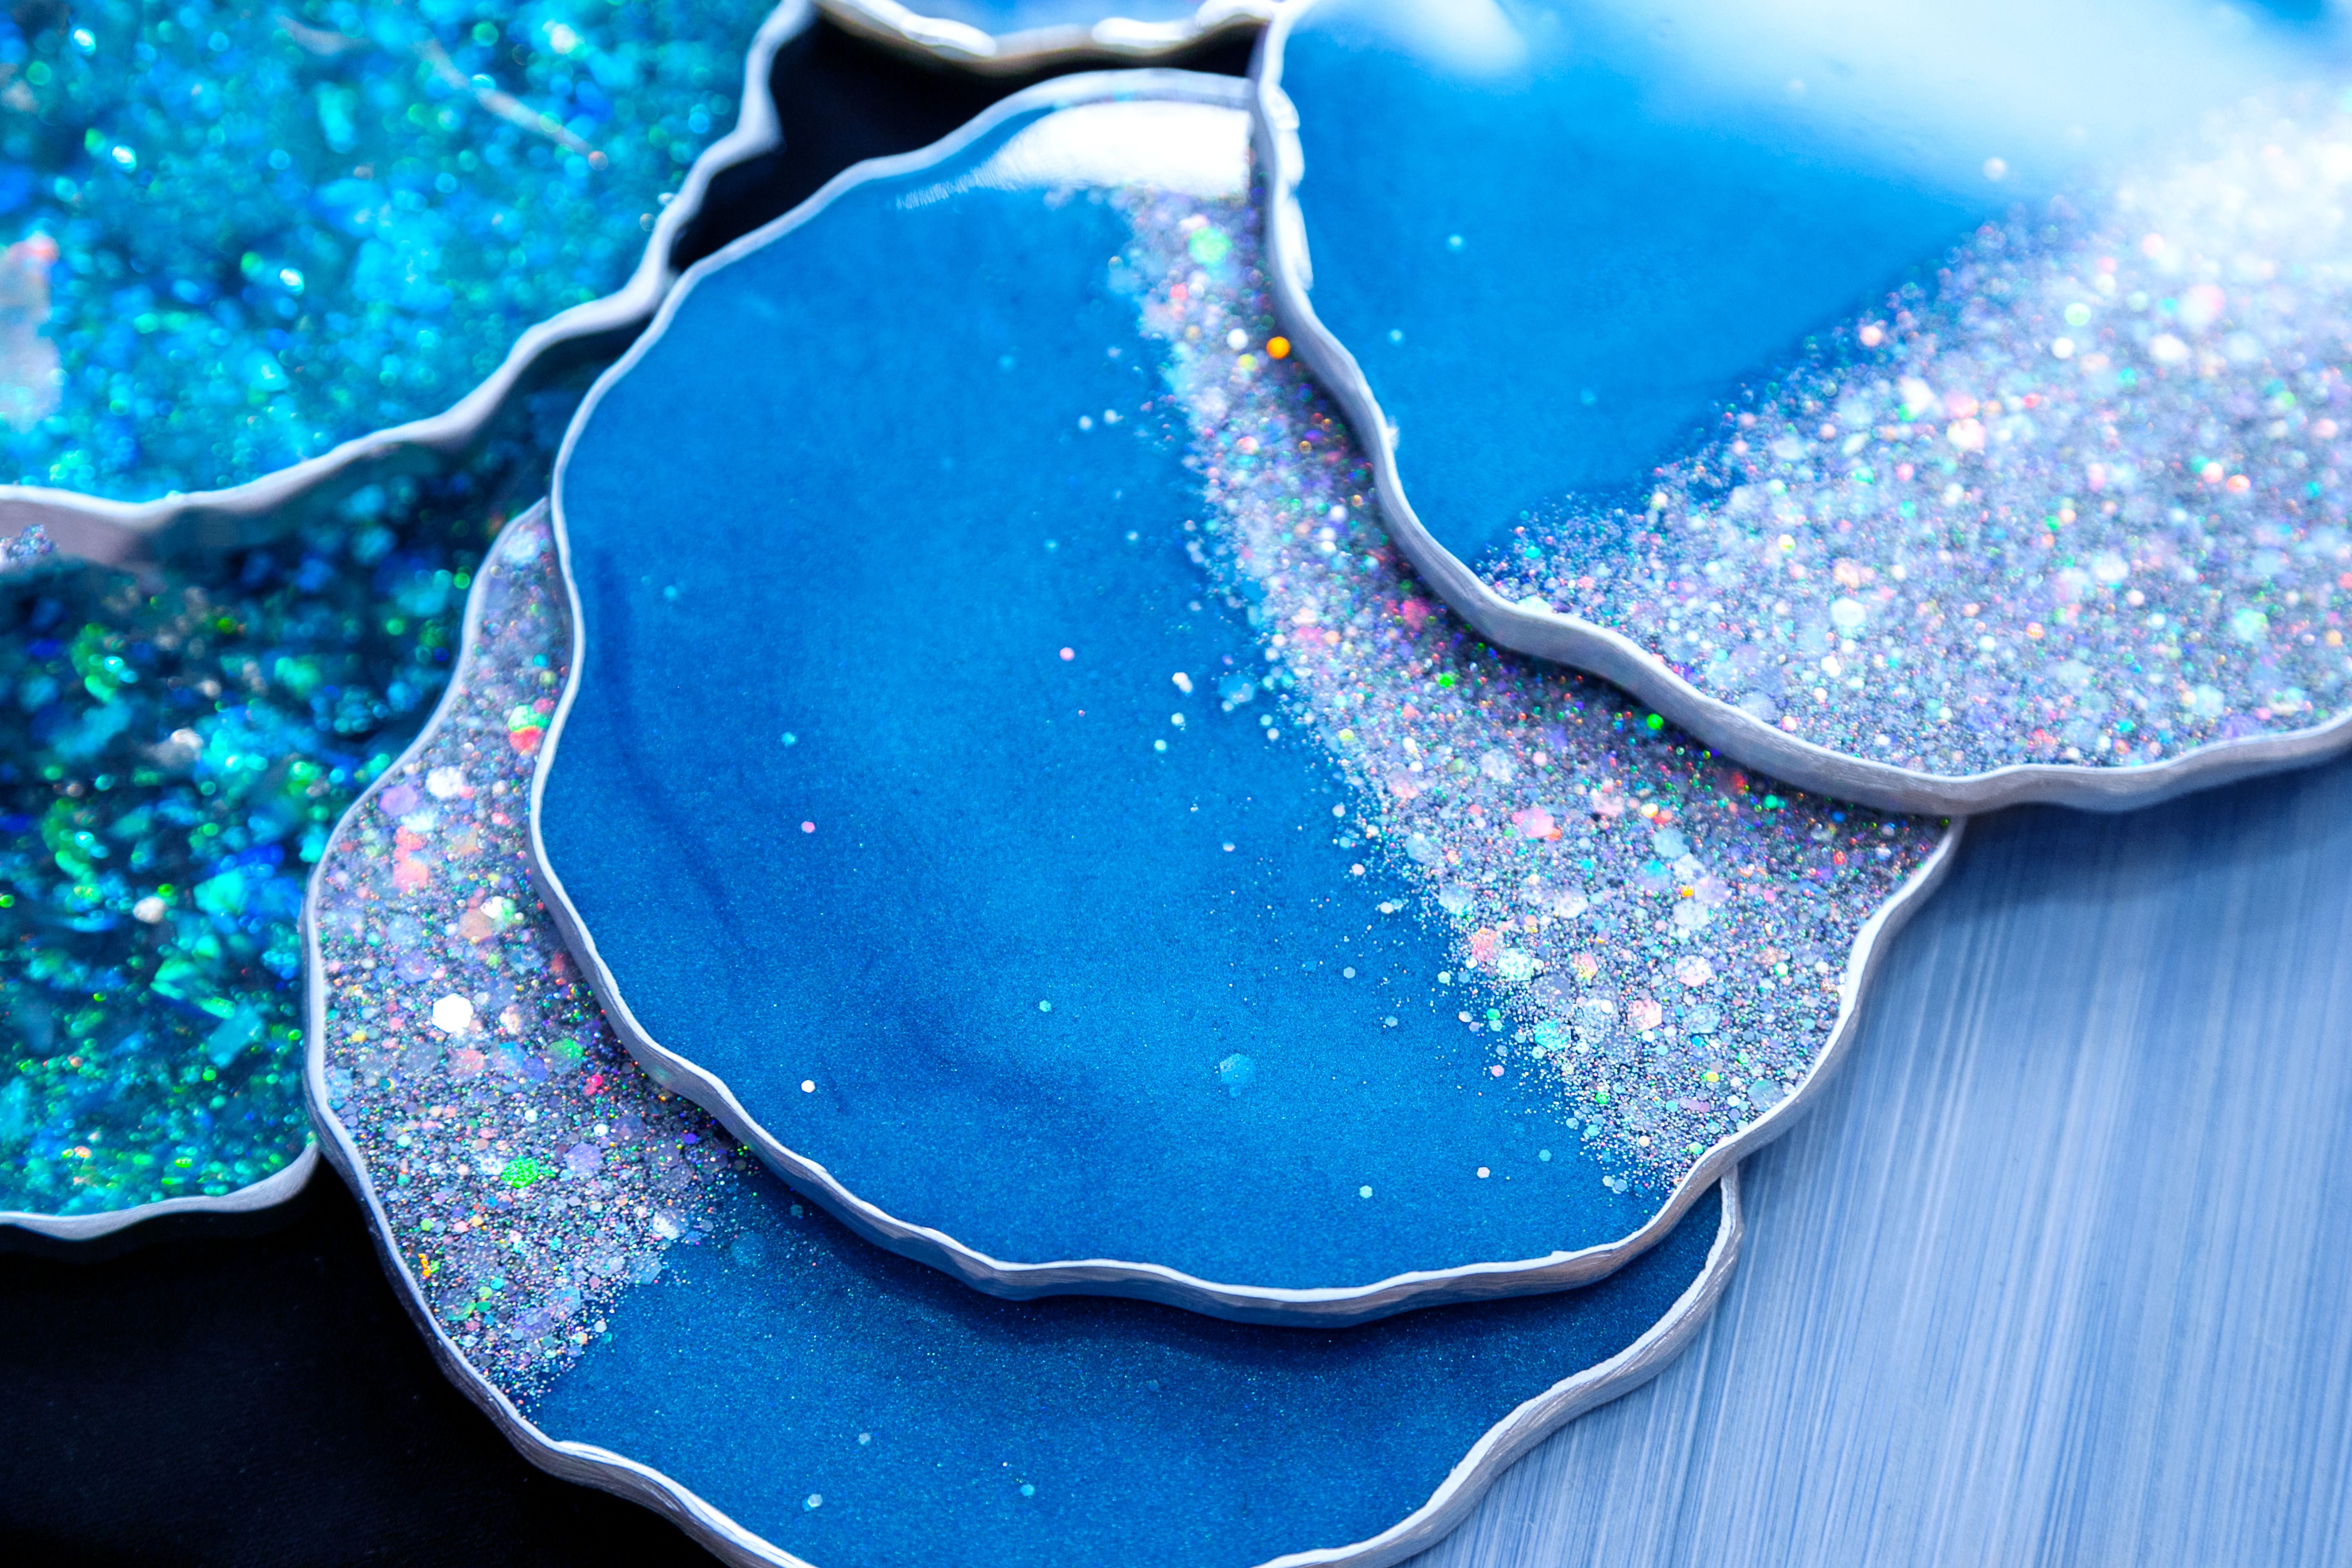
Once cured, gently remove the tray from the mold. If desired, you can sand down any rough edges with fine-grit sandpaper for a smoother finish.
Caring for Your Resin Tray
To keep your resin tray looking its best, clean it with a soft cloth and mild soap. Avoid using abrasive cleaners or scrubbing pads that might scratch the surface.
With these simple steps, you can create stunning custom resin trays that add a personalized touch to any space. Experiment with different colors and embellishments to make each piece truly unique!