
DIY Resin Art: Creating Handmade Rolling Trays at Home


Resin art has taken the DIY world by storm, offering endless possibilities for creating stunning, personalized pieces. One particularly popular project is crafting handmade resin rolling trays. These trays not only serve as functional pieces but also as beautiful art displays. Whether you're a seasoned resin artist or a curious beginner, making your own rolling tray at home can be a rewarding experience.
Essential Materials for DIY Resin Rolling Trays
Before diving into your resin art project, it's crucial to gather all necessary materials. Here's a list to get you started:
- Epoxy resin and hardener
- A silicone tray mold
- Mixing cups and sticks
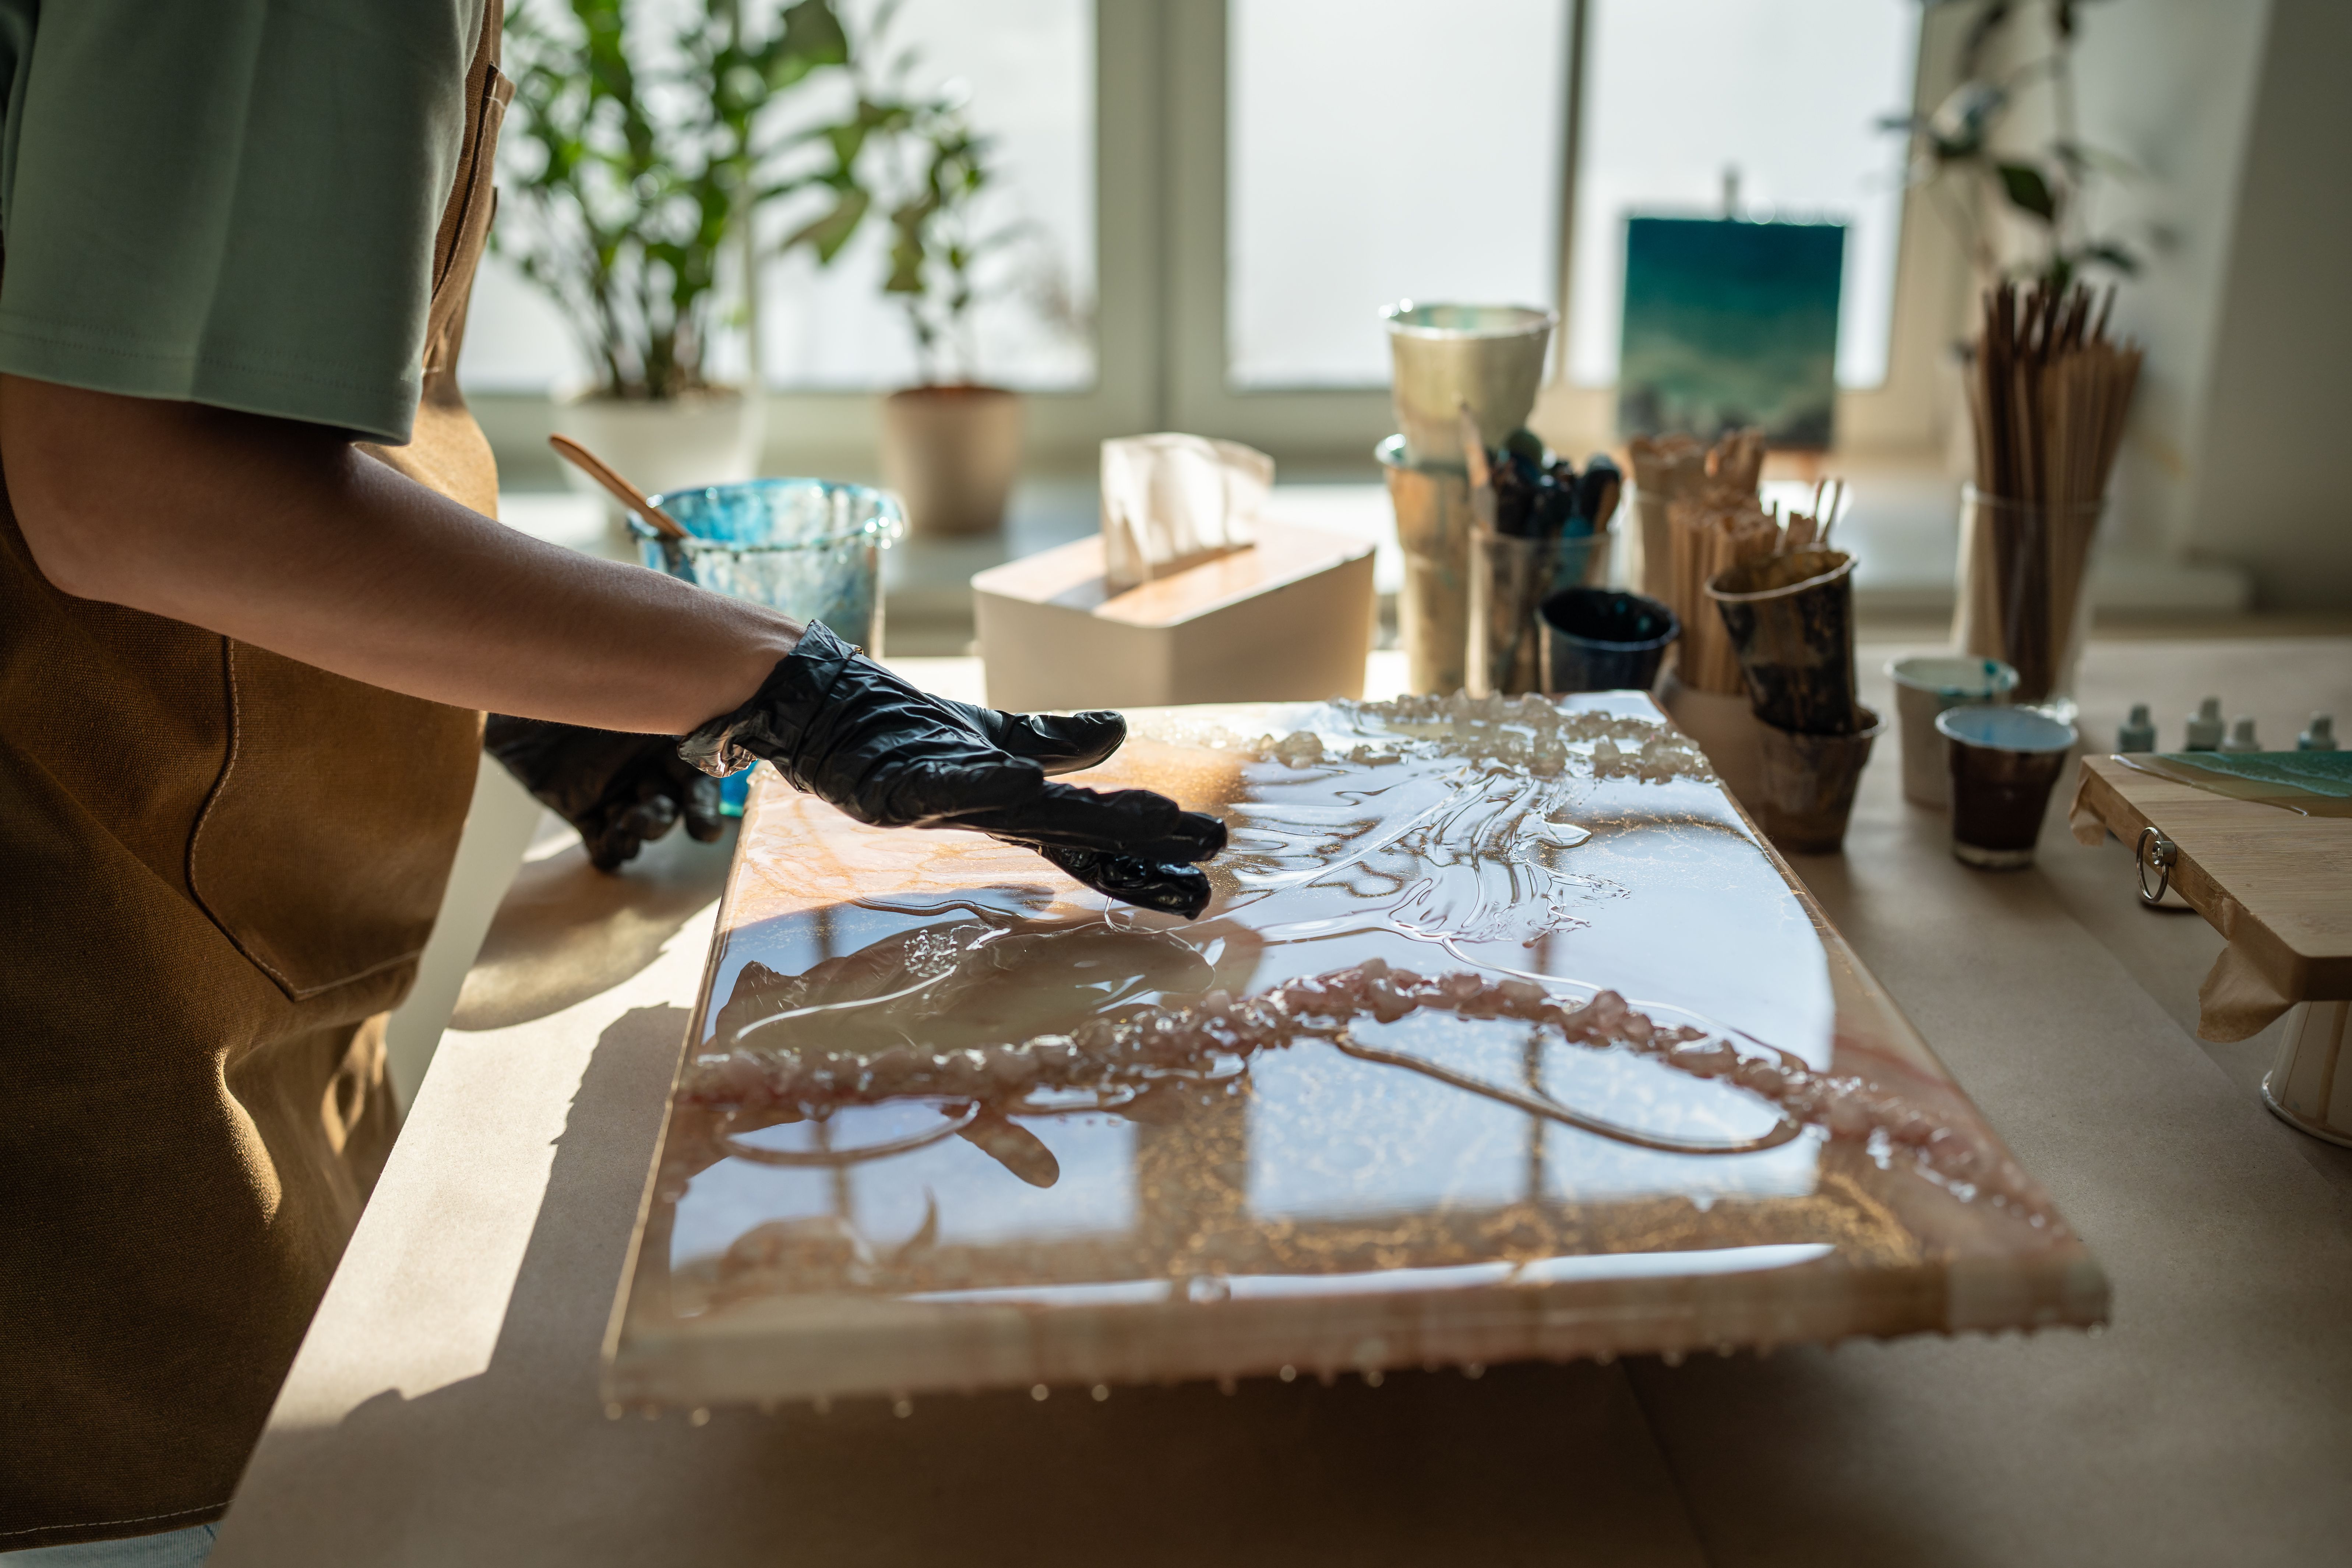
- Protective gloves and a mask
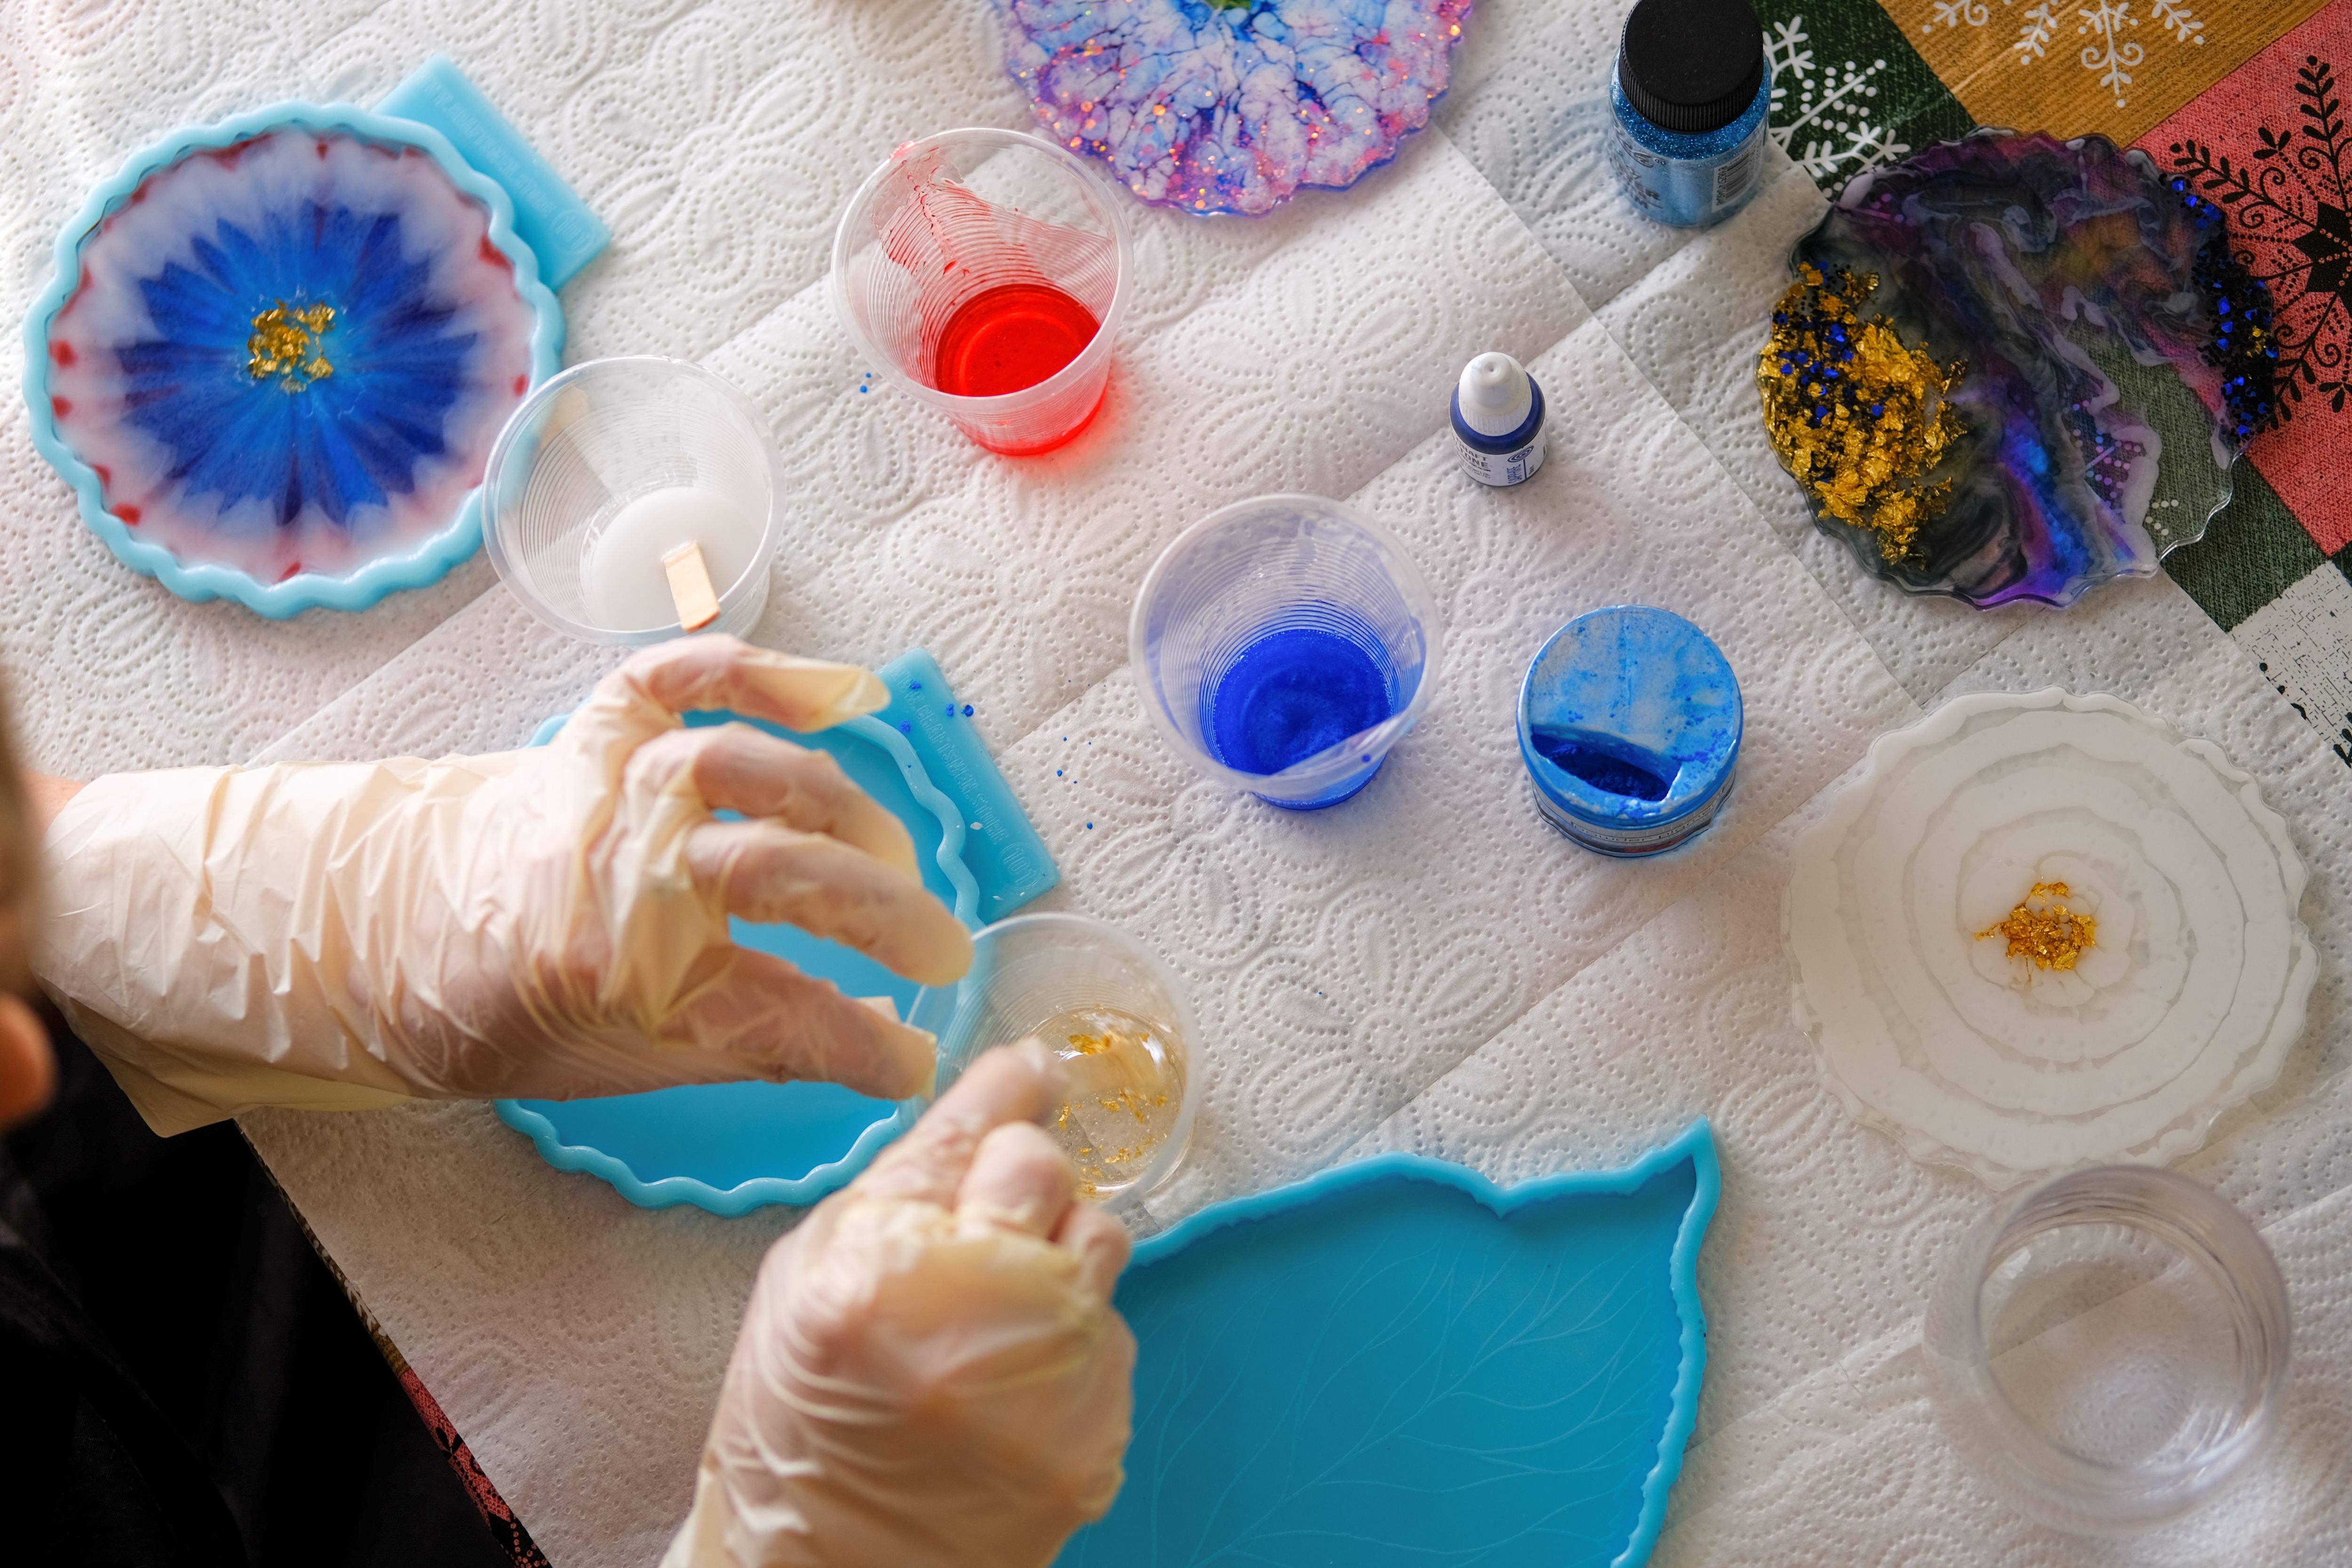
- Color pigments or mica powders
- Decorative elements like glitter, dried flowers, or foil flakes
- A heat gun or torch
Preparing Your Workspace
Setting up a proper workspace is vital to ensure a smooth crafting process. Make sure your area is well-ventilated and covered with protective sheets to prevent any resin spills. Wearing gloves and a mask will protect you from potential skin irritations and fumes. Organize all your materials within easy reach to make the crafting process more efficient.
Mixing and Pouring the Resin
The key to a successful resin tray is achieving the right resin consistency. Follow the instructions provided with your epoxy resin kit, usually involving a specific ratio of resin to hardener. Stir the mixture thoroughly for a few minutes until it's well-combined.
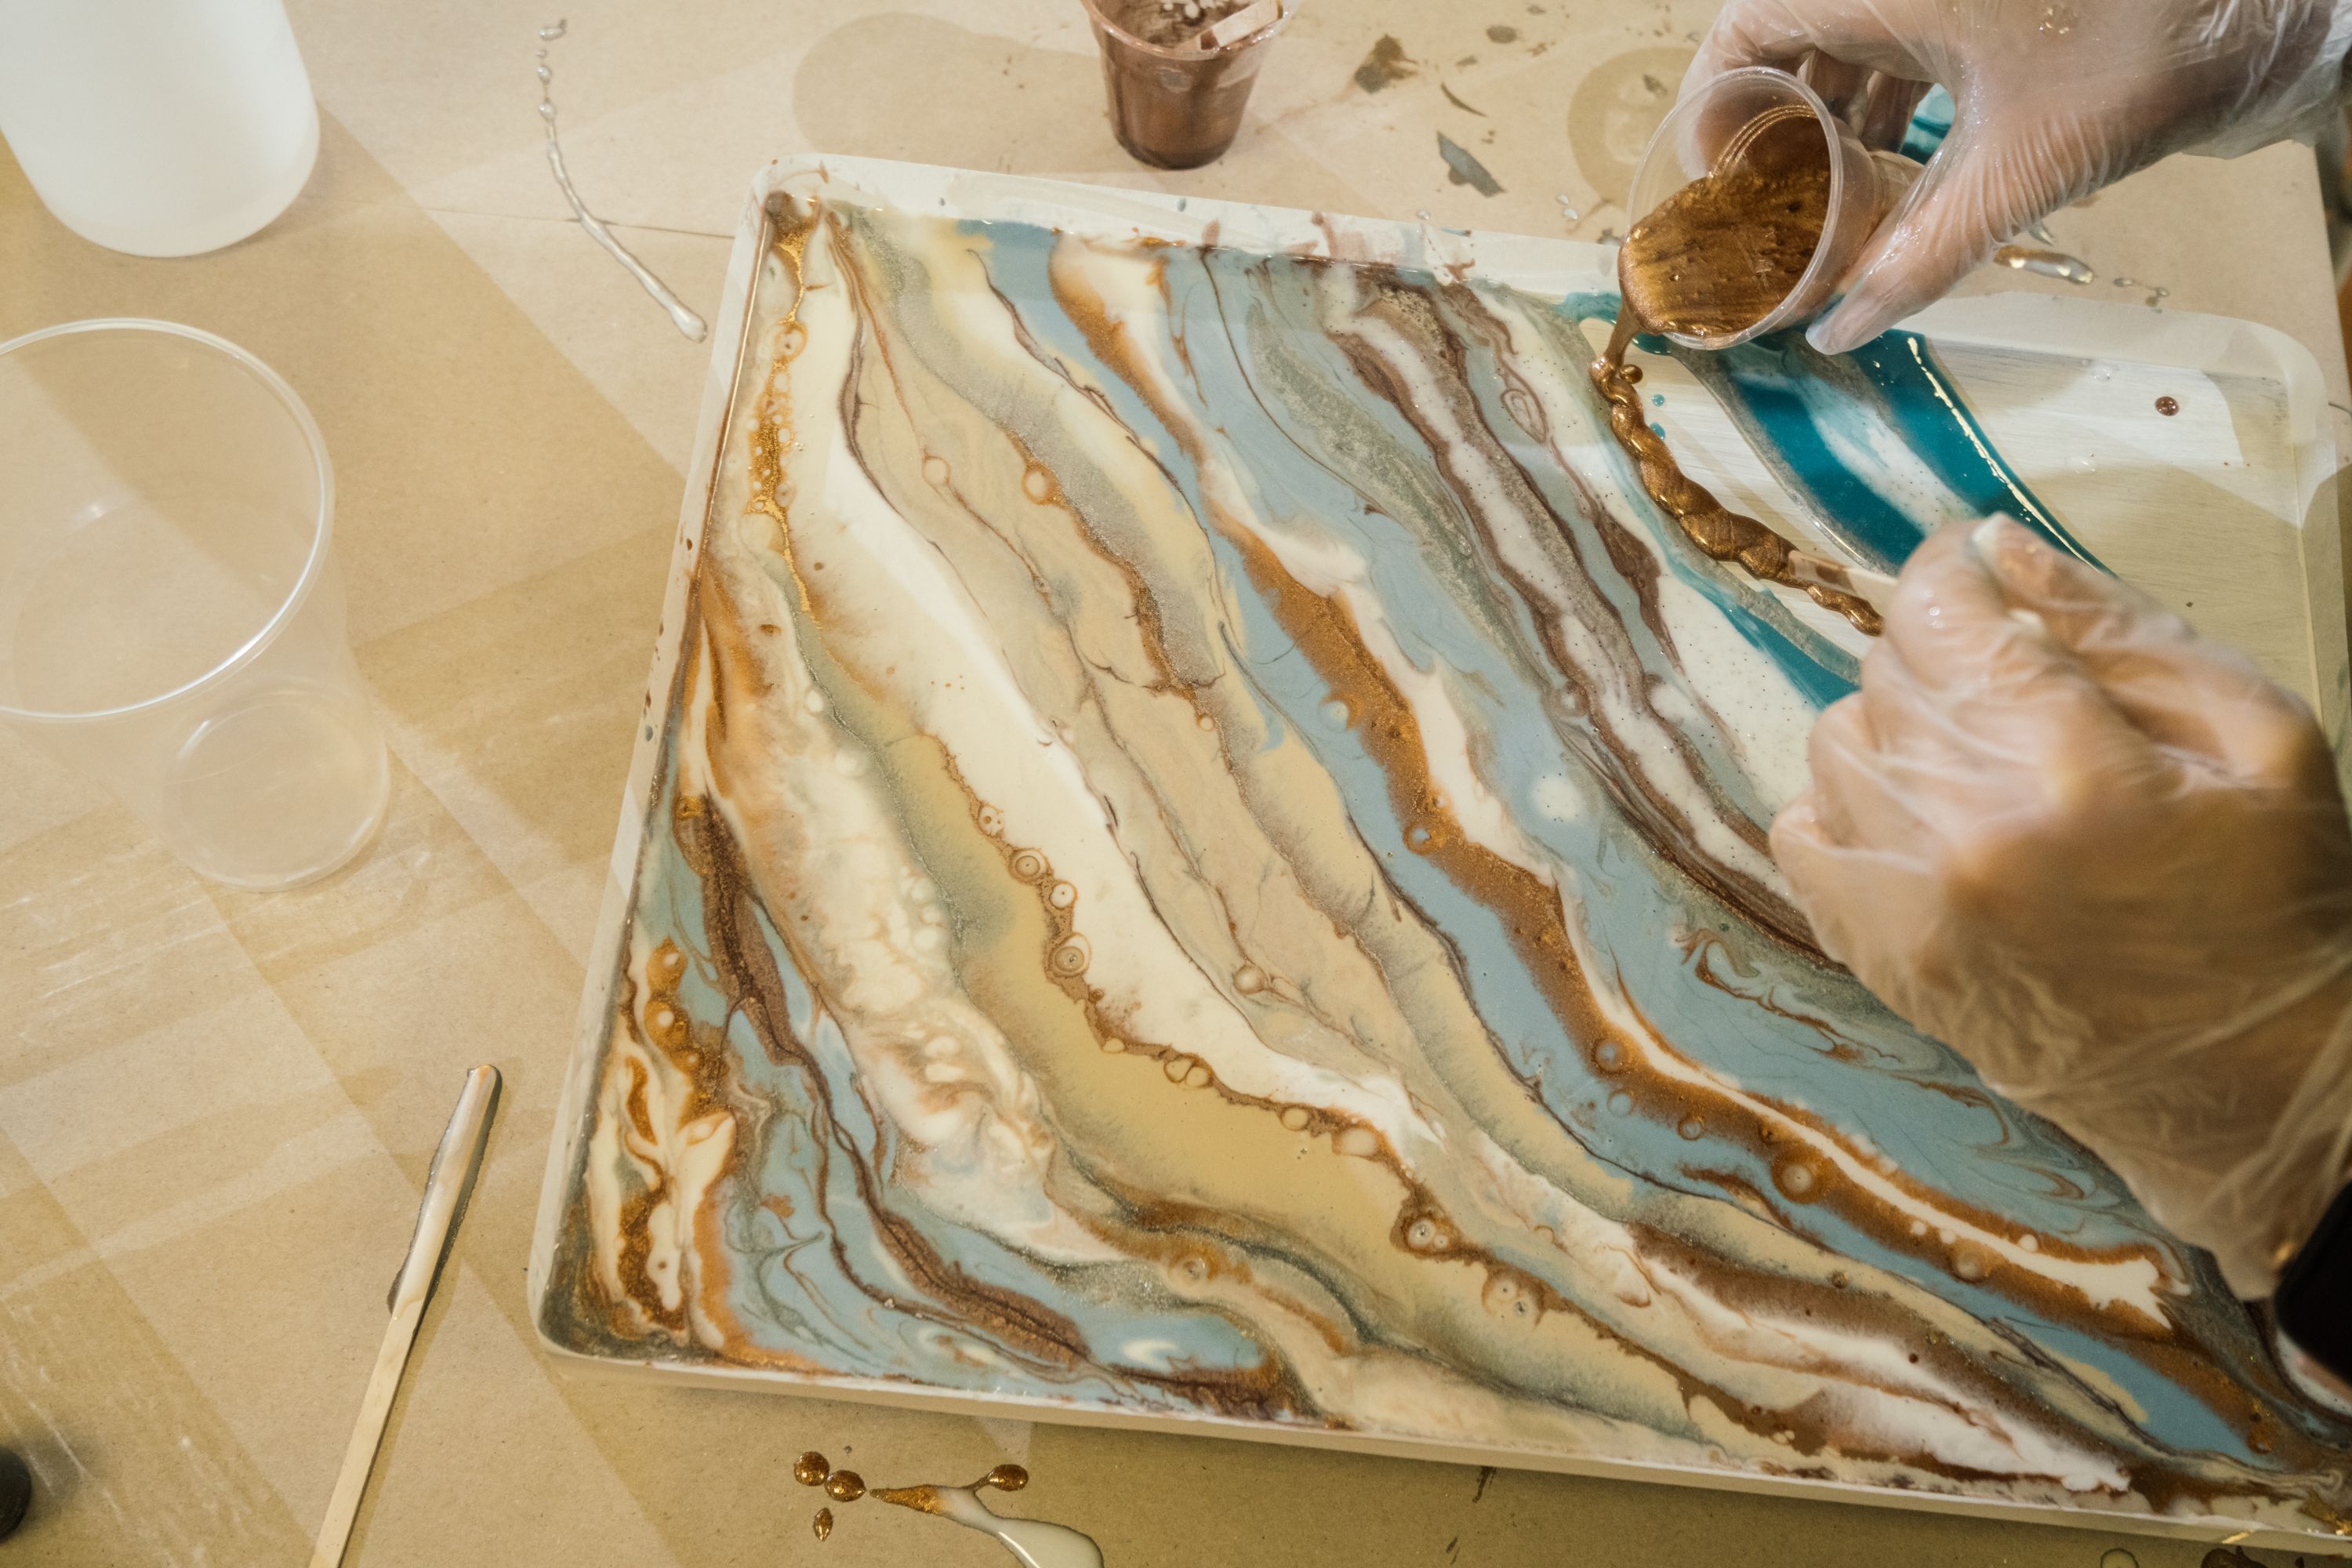
Once mixed, pour a thin layer of resin into the tray mold. Add your chosen color pigments or mica powders to create vibrant hues. You can experiment with different combinations to achieve your desired look.
Adding Personal Touches
This is where you can let your creativity shine. Incorporate decorative elements such as glitter, dried flowers, or foil flakes into the resin. Use a toothpick or crafting stick to arrange these elements precisely. Be mindful not to overcrowd the space, allowing the colors and decorations to blend naturally.
Curing and Finishing
After adding your personal touches, let the tray cure according to the resin manufacturer's instructions, typically taking 24-48 hours. Throughout this time, keep an eye out for any bubbles that rise to the surface. Use a heat gun or torch to gently eliminate them, ensuring a smooth finish.
Once fully cured, carefully remove the tray from the mold. If needed, sand down any rough edges for a polished look. Finally, admire your creation—a unique piece of art that’s both functional and decorative.
Troubleshooting Common Issues
Even seasoned crafters encounter challenges when working with resin. Common issues include bubbles, uneven surfaces, or sticky finishes. To avoid these problems, ensure you're mixing the resin thoroughly and using the right ratio of ingredients. A heat gun can help in popping bubbles, while an extra layer of clear resin can even out surfaces.
Creating handmade resin rolling trays is an exciting way to explore your artistic side while producing something practical. With patience and practice, you can craft stunning pieces that reflect your personal style. So gather your materials, set up your workspace, and start your DIY resin art journey today!